The setting is perfect, the model couldn’t be more adorable, but there’s one element you can’t control – lighting. Natural light fluctuates, shadows move, indoor lights vary in intensity and color temperature. You need to master how to handle varied lighting conditions to get those pawfect pet portraits. This comprehensive guide on ‘Perfecting the Pawtraits: Mastering Editing for Varied Lighting in Pet Photography’ is just the ticket to achieving this.
Through the course of this detailed write-up, we’ll delve deep into the technicalities of capturing and editing images under different lighting conditions. We aim to simplify the intricacies of this topic, making it approachable even for those just venturing into the realm of pet photography.
While the charm and innocence of pets make them a joy to photograph, the varied lighting conditions can pose a challenge. How do you capture a black dog in a dimly lit room? Or how do you prevent a white cat from getting overexposed in bright sunlight? We’ll tackle these questions and more, providing you with practical tips to maneuver around these hurdles with ease.
Firstly, we’ll focus on understanding the basics of lighting in photography. Knowing how different types of light can impact your image is the foundation for successful shooting and editing. From soft morning light to harsh midday sun, from indoor artificial lighting to an overcast sky – we’ll decipher how each of these conditions affects your pet photography and how you can use them to your advantage.
Next, we’ll move on to pre-shoot preparations. A well-prepared photographer is half the battle won. We’ll discuss equipment considerations, techniques to train your pet model, and how to plan for varying light conditions. Regardless of whether you’re using a top-of-the-line DSLR, a smartphone camera, or something in between, our tips and techniques are designed to help you get the most out of your gear.
Then, we’ll guide you through the process of shooting under different lighting conditions. From the importance of shooting in RAW format to exposure adjustment techniques, we’ll take you through each step in detail. And yes, we’ll also share some tricks to keep your furry models engaged and cooperative throughout the shoot!
Finally, we’ll enter the realm of post-processing. Here’s where the magic truly happens! From adjusting exposure and white balance to tackling high dynamic range scenarios – we’ll reveal the secrets of transforming your photos from good to great. You’ll learn to harness the power of photo editing tools to optimize your images for varied lighting conditions.
By the end of this comprehensive guide, you’ll have a solid understanding of how to manage and manipulate light to your advantage in pet photography. Your photos will not only capture the adorability of your pet subjects but also tell a story, evoke emotions, and showcase your technical prowess as a photographer. So, let’s embark on this enlightening journey of mastering varied lighting in pet photography together.
Understanding the Art of Pet Photography
As a technical writer specializing in photography, my goal is to provide you with insightful knowledge about the specific challenges and techniques in pet photography, particularly dealing with varied lighting conditions. Pet photography can be as unpredictable as the creatures themselves, but with the right tools and techniques, you can master the craft. For a more in-depth view on this topic, watch “Mastering Pet Photography in Varied Lighting” by Photography Masterclass on YouTube.
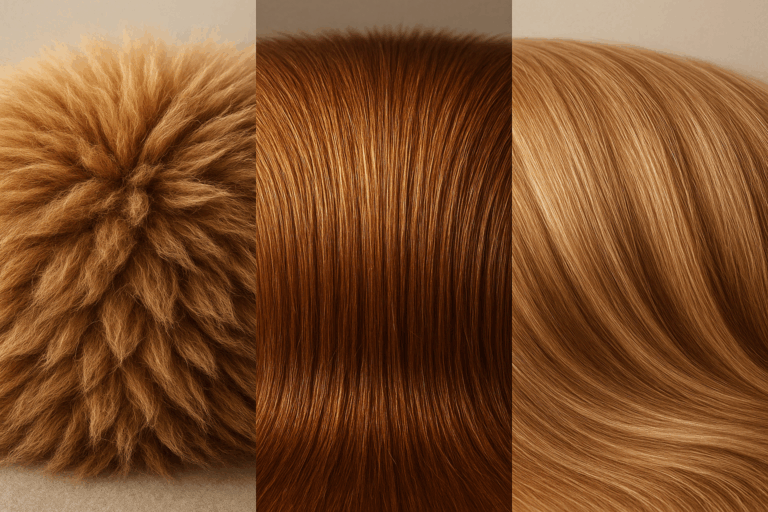
One of the most critical aspects of pet photography is understanding and manipulating light. Light can dramatically affect the outcome of your image. It can emphasize features, create mood, and add depth. It can also pose significant challenges, such as uneven exposures, washed out colors, and unwanted shadows. But fret not, as these can be controlled and even utilized to create stunning pet portraits.
Mastering lighting in photography is a combination of technical knowledge and artistic intuition. It involves understanding the different types of light sources, their characteristics, and how they can be manipulated for desired results. In pet photography, this can be quite challenging as pets can be unpredictable and move around constantly. Hence, a good grasp of lighting principles and quick reflexes can be your best allies.
Types of Light and Their Characteristics
Before we delve into techniques for managing varied lighting conditions, let’s first understand the types of light and their characteristics. Essentially, there are two types of light – natural light and artificial light. Natural light comes from the sun, while artificial light includes studio lights, flash, and even household lamps.
Each type of light has its own set of characteristics. Natural light, for instance, varies throughout the day and can create a wide range of looks – from soft and warm during the golden hour to harsh and bright at midday. On the other hand, artificial light provides more control and consistency, but it can be tricky to balance and may require additional equipment.
One way to better understand these characteristics is through a comparative table. Below is a simple comparison between natural and artificial light:
Natural Light
Artificial Light
Variability
High
Low
Control
Low
High
Equipment
None required
May require additional equipment
Effect on Subject
Varies with time of day and weather
Consistent, can be modified as desired
By understanding these characteristics, you can better plan your pet photography sessions and anticipate potential challenges. For instance, if you are shooting outdoors with natural light, you may have to deal with sudden changes in lighting conditions. Alternatively, if you are shooting indoors with artificial light, you may need to adjust the intensity and direction of the light to achieve the desired effect.
Mastering Exposure for Varied Lighting Conditions
Exposure is another fundamental concept in photography that plays a crucial role in managing varied lighting conditions. In layman’s terms, exposure is the amount of light that reaches your camera sensor. It is determined by three key settings: aperture, shutter speed, and ISO. Together, these three elements form the Exposure Triangle.
Aperture controls the amount of light by adjusting the size of the lens’s opening. Shutter speed controls the duration of light by determining how long the shutter stays open. And ISO controls the sensitivity of your camera’s sensor to light. Understanding how these settings interact can help you achieve proper exposure and handle challenging lighting situations.
For a more visual understanding of exposure, I recommend watching “Understanding Exposure: The Exposure Triangle” by B&H Photo Video on YouTube. In this video, you’ll learn how to balance aperture, shutter speed, and ISO to create well-exposed images.
Practical Tips for Handling Varied Lighting in Pet Photography
Now that we have a solid understanding of lighting and exposure, let’s explore some practical tips for handling varied lighting in pet photography.
1. Utilize Natural Light
Natural light is a beautiful and readily available light source that can yield stunning results. When shooting outdoors, take advantage of the golden hours – the first hour after sunrise and the last hour before sunset – when the light is soft and warm. When shooting indoors, use windows as a natural light source. Just be mindful of the direction of light and adjust your position accordingly to avoid harsh shadows.
2. Understand and Use Your Camera’s Metering Modes
Your camera’s metering modes can be a powerful tool in managing lighting conditions. Metering modes determine how your camera measures light. By understanding and using the right metering mode, you can ensure correct exposure even in challenging lighting situations.
3. Use Reflectors and Diffusers
Reflectors and diffusers are invaluable tools in controlling light. Reflectors can bounce light onto your subject, filling in shadows and adding highlights. Diffusers, on the other hand, can soften harsh light and reduce contrast. By mastering these tools, you can enhance your pet portraits regardless of the lighting conditions.
Remember, mastering lighting in pet photography requires practice and patience. So don’t be disheartened if you don’t get it right the first time. Experiment with different lighting conditions, learn from your mistakes, and in time, you’ll be creating pawfect portraits of your furry friends.
ConclusionAs we wrap up this in-depth exploration into the intricacies of software engineering, it’s paramount to take a few moments to review and consolidate the key points we’ve covered. A clear understanding of these concepts is crucial to effectively apply these principles and approaches to your work in the field of Information Technology and Engineering.
We commenced our journey with a deep dive into the principles of software engineering, highlighting the significance of software design, coding, testing, and maintenance in the development of high-quality, reliable software systems. We also explored different methodologies and their applications, like the traditional Waterfall Model, the Agile approach, and the DevOps methodology. This gave us an understanding of the benefits and drawbacks of each, aiding us in making informed decisions when selecting the appropriate method for different projects.
The importance of coding standards and their impact on software quality was another pivotal point in our discussion. Proper coding practices enhance readability, maintainability, and scalability of software. We also delved into different testing strategies and tools, emphasizing the role of continuous testing in identifying and rectifying defects early in the software development lifecycle.
Furthermore, we touched upon the significance of project management in software engineering, discussing different project management techniques and their effectiveness in ensuring timely delivery of quality software products. Understanding the intricacies of project management is not merely an advantage, but a necessity in today’s fast-paced software development environment.
The role of Artificial Intelligence (AI) and Machine Learning (ML) in modern software engineering was also a key part of our discussion. We saw how these technologies are revolutionizing the software industry, making systems smarter, more efficient, and increasingly autonomous.
As we conclude, let’s remember that the world of software engineering is dynamic and ever-evolving. It’s essential to stay updated with the latest developments and trends. Constant learning and adaptation are the keys to success in this field. I encourage you to dig deeper, explore more, and apply the knowledge gained from this article in your work.
Feel free to share this piece with others who might find it helpful or leave a comment with your thoughts or questions. Your insights and experiences will add to the richness of the conversation.
For further reading, I recommend the following resources: [Software Engineering: A Practitioner’s Approach](http://www.cs.stir.ac.uk/courses/CSC9P6/documents/SEPA-7th-edition.pdf) by Roger S. Pressman and [Software Engineering (10th Edition)](https://www.amazon.com/Software-Engineering-10th-Ian-Sommerville/dp/0133943038) by Ian Sommerville.
In addition, staying up-to-date with blogs such as [Software Engineering Daily](https://softwareengineeringdaily.com/) and [The New Stack](https://thenewstack.io/) can provide you with regular insights into the latest trends and best practices in the software engineering world.
Thank you for taking the time to journey through this intricate world of software engineering with me. Keep exploring, keep learning, and keep innovating.
> “The function of good software is to make the complex appear to be simple.” – Grady Booch