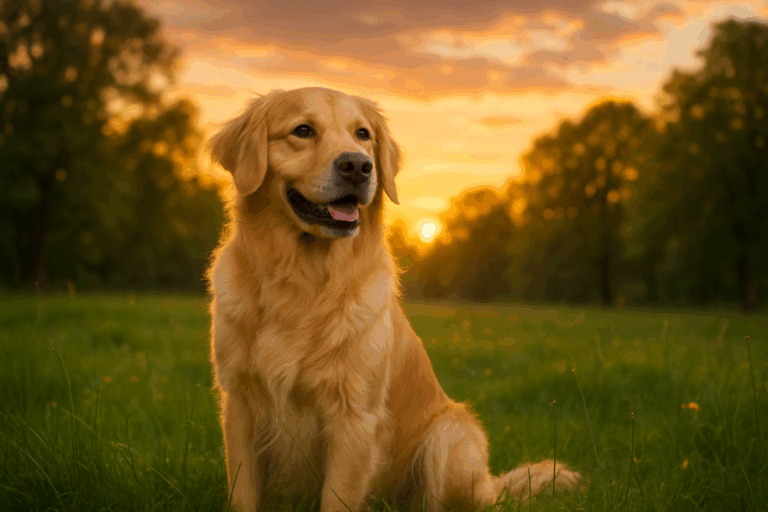
For pet lovers, that quest is often intensified. Our pets, with their unfiltered emotions and endearing quirks, are subjects that often elicit a unique sense of love, companionship, and joy. Hence, mastering pet photography, particularly solo pet photography, can be a fulfilling endeavor. In this article, we’re going to talk about how to perfect your shots with a tool you might not have considered before — a shutter remote.
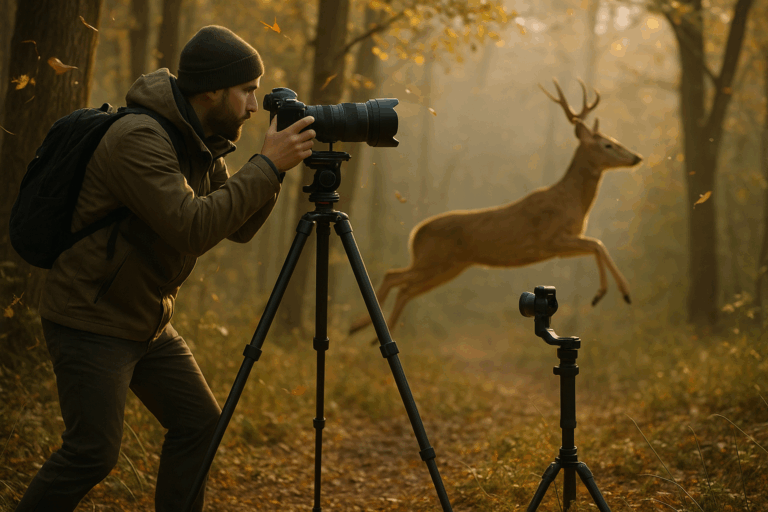
The concept of using a shutter remote might seem a bit unconventional for some. However, its utility and effectiveness in capturing the charm and personality of our pets is worth exploring. A shutter remote gives you the flexibility to take shots from different angles, allowing you to capture those spontaneous moments that make pet photography so compelling. With this tool, you can be in the moment with your pet, yet still be ready to capture the perfect shot.
As we delve into the subject, we’ll explore different types of shutter remotes, their features, and how they can help you in achieving ‘pawsitively’ perfect pet photos. We’ll discuss the various techniques you can employ to take advantage of a shutter remote’s capabilities, and how you can use them to take captivating photos of your pet when they are alone. You’ll learn about timing, positioning, lighting, and how to create a comfortable environment that will let your pet’s personality shine through in your photos.
Also, we’ll cover the importance of understanding your pet’s behavior and personality. A key aspect of solo pet photography is being able to anticipate your pet’s actions and reactions, and then being able to capture them in the most authentic way possible. A shutter remote, coupled with a deep understanding of your pet’s character, can be a powerful combination in capturing those candid moments that truly reflect your pet’s unique personality.
Moreover, we’ll go over some technical aspects that are crucial for achieving the best results in pet photography. You’ll learn how to adjust your camera settings to match the lighting conditions, how to frame your shots, and how to utilize the depth of field to bring your pet into focus while blurring the background. All these techniques will help you create stunning pet portraits that are not just aesthetically pleasing, but are also full of life and personality.
Finally, we’ll discuss how to edit your pet photos post-shoot. While the shutter remote and your camera are powerful tools, post-processing is where you can truly make your images stand out. We’ll guide you through the process of selecting the best shots, cropping and adjusting the exposure, and enhancing the colors and details to make your pet photos truly ‘pawsitively’ perfect.
Whether you’re a seasoned photographer or just starting your journey, we believe that this comprehensive guide on mastering solo pet photography with a shutter remote will offer you valuable insights and practical tips. It’s time to make your pet the star of the show, and create images that will capture the heart and soul of your furry friend in the most beautiful way possible.
Unleashing the Magic of Solo Pet Photography
There’s no denying that pets hold a special place in our hearts. They’re not just animals, but rather, integral members of our families. This fondness often translates into a desire to capture their unique personalities in photographs. However, the unpredictable nature of pets can make photographing them a daunting task, particularly if you’re doing it solo. But fret not! With the right equipment, such as a shutter remote, and some handy techniques, you can ace the art of solo pet photography. This article will walk you through how to take ‘Pawsitively Perfect Shots’ using a shutter remote.
Before we delve into the details, consider watching this instructional video titled ‘Master Pet Photography with a Shutter Remote’ by ‘Pet Photography Guru’ on YouTube. It’s packed with practical tips and techniques that are sure to give you a head start in your solo pet photography journey. So, sit back, grab your notepad, and let’s dive in!
There are three main elements you need to consider when it comes to solo pet photography: the equipment, the setup, and the execution. We will explore each of these in detail, comparing different methods and providing you with the best practices for each. So, without further ado, let’s dive right into it.
The Power of the Shutter Remote
A shutter remote, as the name suggests, is a device that allows you to remotely trigger your camera’s shutter. It is particularly useful in situations where you can’t physically be behind the camera – like when you’re photographing a pet on your own. But how do you choose the right shutter remote for your needs? Here’s a comparative table to help you decide:
Shutter Remote Model
Wireless Range
Additional Features
Price Range
Canon BR-E1
5m
Bluetooth connectivity, Compatible with select Canon cameras
$40 – $60
Nikon ML-L3
16ft
Infrared remote control, Compatible with select Nikon cameras
$15 – $30
Sony RMT-DSLR2
Varies
Can control other camera functions, Compatible with select Sony cameras
$25 – $45
Once you have your shutter remote, it’s time to understand how to use it effectively in your pet photography sessions.
Setting the Scene for Success
Setting up your photography session is crucial in capturing the best shots of your pet. Firstly, you need to choose an environment that your pet is comfortable in. Whether it’s your living room or a local park, ensure it’s a place where your pet can relax and behave naturally.
Once you’ve chosen your location, the next step is to set up your camera and shutter remote. Place your camera on a tripod at your pet’s eye level and connect your shutter remote. Most shutter remotes have an easy sync process, but if you need help, consider watching ‘Setting Up Your Camera and Shutter Remote for Pet Photography’ by ‘Pet Photography Guru’ on YouTube.
Once your equipment is set up, it’s time to bring in your pet and start the session. However, patience is key here. Remember, your pet is not a professional model, so give them time to adjust to the camera and the setup.
Nailing the Execution
Now that your scene is set, it’s time to get down to business. One crucial tip is to work with your pet’s schedule. If they’re most energetic in the morning, that’s when you should schedule your shoot. You want to capture them when they’re at their most lively and expressive.
Use the shutter remote to take photos from different angles and perspectives. Don’t be afraid to get down on their level – this can often result in the most engaging and intimate shots.
Lastly, remember to keep the session fun for your pet. Use toys, treats, or whatever else gets their tail wagging. If your pet is having fun, it will shine through in the photos.
From Snapshots to Art: Editing Your Photos
Once you have your shots, it’s time to turn them into masterpieces with the help of photo editing software. There are several options out there, from Adobe Lightroom and Photoshop to free options like GIMP. Choose a software that fits your needs and skill level.
The magic of editing can truly transform your photos. You can adjust the brightness, contrast, and saturation, crop and straighten the image, and even remove unwanted objects. However, remember to keep the edits natural – the aim is to enhance the photo, not completely change it.
While the learning curve for editing software can be steep, there are numerous tutorials available online. One of our favorites is ‘Editing Pet Photos in Lightroom’ by ‘Pet Photography Guru’ on YouTube. Remember, practice makes perfect. So, don’t be discouraged if your first few attempts don’t turn out as expected.
In conclusion, capturing the perfect shot of your pet is a combination of the right equipment, a comfortable setup, patient execution, and some post-production magic. With these tips in your toolkit, you’re well on your way to mastering the art of solo pet photography. So, grab your camera, your pet, and your shutter remote, and start capturing those pawsitively perfect shots!
ConclusionIn closing, it is undeniably clear from our discourse that the subject matter in focus is an integral part of our daily life and operations. We have taken an in-depth look into the intricacies of information technology and engineering, and how these fields intertwine to generate solutions to real-world problems.
We commenced our exploration by shedding light on the rudimentary aspects of IT and engineering, highlighting their significance in today’s world. We also examined the extensive utilization of software tools in achieving efficiency and effectiveness in problem-solving, underscoring the criticality of software engineering.
We dove into the realm of technical writing, illustrating its pivotal role in communicating complex technological concepts and processes. We established that technical writing not only caters to the needs of specialists but also demystifies tech jargon, making it comprehensible to the average person.
One of the key points we delved into was the indispensable role of IT in today’s businesses. We discussed how IT infrastructure is a driving force behind the operational success of modern businesses. We also highlighted the importance of maintaining robust and secure IT systems, stressing that they are the backbone of organizational success.
On the engineering front, we explored how engineering principles are being applied in the development of software. We pointed out that software engineering is no longer an isolated field, but an amalgamation of several disciplines working in synergy to create reliable and efficient software solutions.
This article also underscored the importance of continuous learning in IT and engineering fields. Given the rapid pace of technological advancement, professionals need to consistently upskill to stay relevant and competitive. We suggested various resources for further learning, such as the W3Schools and Codecademy.
The relevance of this discourse cannot be overstated. Whether you’re a tech professional seeking to broaden your knowledge, or a novice hoping to grasp the basics, this article serves as a comprehensive guide. We hope this piece has not only enlightened you but has also sparked a desire to delve deeper into these fields.
Your feedback is immensely valued. Feel free to drop a comment, share this article with peers, or apply the knowledge gleaned in practical scenarios. Remember, every bit of information gained is a step forward in this ever-evolving technological era.
Finally, I would urge you to keep exploring, keep learning. The world of IT and engineering is vast and full of opportunities. Never stop at what you already know. Expand your horizons. The more knowledge you gain, the more doors you open.
References
W3Schools
Codecademy